How To Troubleshoot Simple Faults Of Automatic Capsule Filling Machine
Jun 26, 2021
Introduction
You are about to dive into a comprehensive guide on how to troubleshoot simple faults of an Automatic Capsule Filling Machine. This article details common issues and diagnostic steps to optimize performance. As a seasoned industry expert, you will learn troubleshooting techniques applicable to both semi Automatic capsule filling machine and Automatic capsule filling machine systems. Using step-by-step procedures, practical tips, and performance comparisons, you will confidently resolve faults and maintain a smooth production process.
Understanding Automatic Capsule Filling Machines
You must first understand the intricacies of capsule filling machines. These machines are vital components in pharmaceutical production, ensuring that each capsule is accurately filled with the correct dosage.
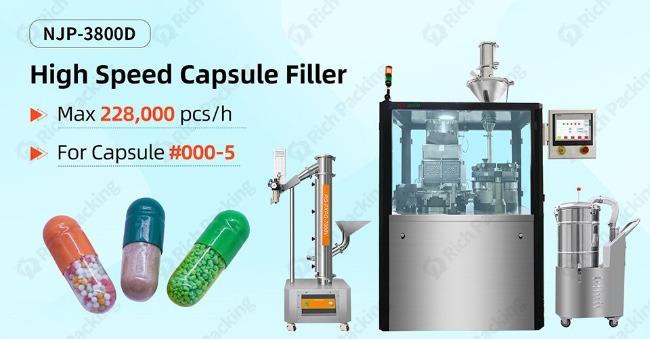
What Is an Automatic Capsule Filling Machine?
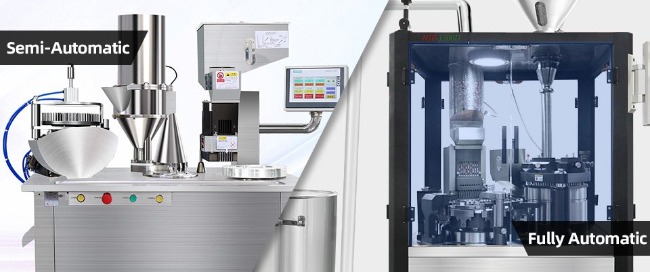
An Automatic Capsule Filling Machine automates the entire process—from capsule loading and filling to sealing. Its design minimizes manual intervention, ensuring high-speed production and consistent quality. The machine uses advanced sensors, digital controls, and a robust mechanical structure for efficient operation. In contrast, a semi Automatic capsule filling machine combines manual loading with automated filling, offering flexibility when handling varied capsule sizes or special formulations. Both types are engineered to meet stringent GMP standards and provide precise, reliable performance.
Core Components and Functions
You should note that these machines consist of several key components:
Feeder Mechanism: Automatically loads capsules into the machine.
Filling System: Dispenses the active ingredients with high accuracy.
Sealing Unit: Ensures that capsules are securely closed.
Control System: Monitors and adjusts the process in real time.
Sensors and Feedback Loop: Detects any anomalies or errors during production.
Understanding these components is crucial as they form the foundation for troubleshooting.
Common Faults in Automatic Capsule Filling Machines
You will encounter a range of simple faults that can disrupt operation. Identifying these issues early is essential for maintaining efficiency and ensuring product quality.
1. Electrical and Power Issues
Electrical faults are common and can occur due to power fluctuations, wiring problems, or component failures.
Symptom: Machine fails to start or suddenly shuts down.
Cause: Loose connections, blown fuses, or power supply issues.
Action: Check the power source, inspect cables, and verify that all electrical components are functioning properly.
2. Mechanical Malfunctions
Mechanical issues often manifest as abnormal noises, vibrations, or improper movement of components.
Symptom: Inconsistent capsule movement, jamming, or misalignment in the filling station.
Cause: Worn-out gears, faulty bearings, or issues with the feeding mechanism.
Action: Perform a detailed inspection of moving parts, lubricate joints, and replace any damaged components.
3. Software and Control System Errors
Modern machines depend heavily on control systems. Software glitches can cause display errors or misinterpret sensor inputs.
Symptom: Error codes appear on the digital display, or the control panel becomes unresponsive.
Cause: Outdated software, communication errors between components, or sensor misreadings.
Action: Reset the system, update the software, or recalibrate the control sensors accordingly.
4. Dosing Accuracy and Calibration Issues
Inaccurate dosing affects both quality and compliance.
Symptom: Capsules filled with too much or too little active ingredient.
Cause: Calibration drift, clogging in the dosing system, or worn dispensing components.
Action: Recalibrate the machine, clean dosing nozzles, and ensure proper alignment and maintenance of the fill mechanism.
5. Sensor and Feedback Problems
Sensors are critical for monitoring the process in real time. Faulty sensor inputs can lead to erroneous operation.
Symptom: Inconsistent performance metrics or unexpected machine stoppages.
Cause: Dust accumulation, sensor misalignment, or sensor aging.
Action: Clean and realign sensors, and replace sensors if necessary.
Troubleshooting Methodology
You need a systematic approach for effective troubleshooting. A methodical process helps identify faults, isolate issues, and implement corrective measures efficiently.
Step 1: Gather Essential Tools and Data
Before troubleshooting, ensure you have the proper tools available:
Multimeter: For testing electrical circuits.
Screwdrivers and Wrenches: For opening machine compartments.
Diagnostic Software: To read error codes and sensor outputs.
User Manuals: For reference on specific machine operations and troubleshooting steps.
Gather error logs and operational data to pinpoint when and where faults occur.
Step 2: Perform a Visual Inspection
Begin with a thorough visual inspection of the capsule filling machine.
Inspect Wiring and Connectors: Look for loose or damaged cables.
Check Mechanical Components: Verify that belts, gears, and moving parts are secure and functioning.
Examine Display Panels: Look for error messages or abnormal indicators.
Document Findings: Record any irregularities for further analysis.
A visual inspection often reveals faults that may be addressed before complex diagnostics are needed.
Step 3: Check the Power Supply and Electrical Components
Ensure that the machine receives a stable power supply.
Verify Voltage Levels: Use a multimeter to check that voltage levels match the machine specifications.
Inspect Circuit Boards: Look for signs of burnt components or soldering issues.
Test Fuses and Breakers: Replace any that have blown.
Record Test Results: Use this data to narrow down potential electrical faults.
Anomalies in power supply are often the root cause of unexpected machine shutdowns.
Diagnostic Techniques for Software Issues
When encountering control system errors, specific diagnostic techniques become essential.
Step 4: Resetting and Updating the System
Reset the control unit to clear temporary glitches.
Perform a Hard Reset: Turn off the machine completely, wait a few minutes, and restart.
Check for Software Updates: Ensure that the machine’s firmware is up to date.
Consult Error Logs: Use the diagnostic software to read error codes and determine the exact software issue.
Software updates and resets often rectify control errors that interfere with routine operation.
Step 5: Calibrate Sensors and Control Modules
Accuracy in sensor readings is essential for proper functioning.
Recalibrate Sensors: Follow the manufacturer’s instructions to recalibrate sensors that monitor dosing, speed, and temperature.
Run Diagnostic Tests: Use the control system’s diagnostic mode to test sensor outputs.
Adjust Sensor Positions: Ensure sensors are correctly aligned within the machine.
Log Calibration Data: Document the calibration settings for future reference.
Regular calibration minimizes sensor drift and maintains optimal machine performance.
Troubleshooting Common Mechanical Faults
Mechanical issues are frequent sources of machine downtime. You must address these systematically.
Step 6: Inspect and Lubricate Moving Parts
Ensure all mechanical components are operating smoothly.
Examine Bearings and Gears: Look for wear signs, corrosion, or misalignment.
Lubricate Moving Parts: Follow recommended lubrication schedules to reduce friction and wear.
Check for Blockages: Ensure no debris or buildup is interfering with the mechanical components.
Replace Worn Components: Order quality spare parts and replace faulty parts promptly.
Maintaining mechanical integrity prevents recurring malfunctions and prolongs the machine’s lifespan.
Step 7: Align the Feeding Mechanism
The capsule feeder is critical for consistent operation.
Inspect Feeder Alignment: Verify that capsules are loaded correctly and move smoothly.
Adjust Feeder Settings: Fine-tune the speed and angle of capsule transport.
Test Under Production Conditions: Run a few cycles to ensure alignment corrections yield the desired performance.
Document Changes: Maintain records of adjustments for future troubleshooting efforts.
A well-aligned feeder ensures consistent capsule filling and reduces mechanical jams.
Troubleshooting Dosing and Calibration Issues
Achieving precise dosing is non-negotiable. Here are the steps to address dosing errors.
Step 8: Recalibrate the Dosing Mechanism
Maintain dosage accuracy by recalibrating the dosing system.
Reset Dosing Settings: Follow calibration procedures outlined in the user manual.
Clean the Nozzles: Remove any residue from dispensing parts to ensure unobstructed flow.
Adjust Dispensing Rates: Fine-tune the settings to achieve the required dosage.
Monitor Output: Compare pre- and post-adjustment dosing to confirm improvements.
Regular dosing calibration is essential for meeting quality standards and regulatory compliance.
Step 9: Inspect Material Flow and Viscosity
The flow properties of the active ingredient affect dosing accuracy.
Check for Clogs: Inspect the material pathway for blockages.
Measure Viscosity: Ensure that the material viscosity remains within the recommended range.
Adjust Flow Rates: Modify pump settings if necessary to accommodate material viscosity.
Record Observations: Note any deviations for future reference and adjustment.
Material consistency is key to maintaining proper dosing and capsule quality.
Troubleshooting Sensor and Control Interface Faults
Faulty sensor readings or control interface issues can lead to erroneous machine operation. Address these concerns with focused diagnostics.
Step 10: Clean and Reposition Sensors
Ensure that sensors are free of dust and positioned correctly.
Clean Sensor Lenses: Use appropriate cleaning materials that do not damage the sensor.
Reposition Sensors: Verify that each sensor is correctly aligned with its designated target area.
Test Sensor Response: Check that each sensor reacts appropriately when exposed to standard test conditions.
Compare Sensor Outputs: Validate that the readings match the machine’s operational parameters.
Accurate sensor readings directly impact the machine’s performance and reliability.
Step 11: Inspect the Control Panel and Digital Interfaces
A malfunctioning control interface can mislead diagnostics.
Examine the Display Screen: Look for unusual errors or delays in response.
Test Button Functions: Verify that all control panel buttons respond as expected.
Check Software Settings: Ensure that the control panel settings are correctly configured.
Update Firmware if Needed: Consider installing the latest firmware to resolve glitches.
A well-functioning control system is crucial for real-time adjustments and operational efficiency.
Preventative Maintenance to Reduce Fault Occurrence
You must adopt preventative measures to reduce the frequency of faults. Regular maintenance practices save time and reduce long-term repair costs.
Routine Maintenance Practices
Implement a strict maintenance schedule that includes:
Daily Inspections: Quick checks before starting production to identify obvious issues.
Weekly Deep Cleanings: Thorough cleaning of all mechanical and electronic components.
Monthly Calibration: Recalibrate sensors and dosing systems to ensure accuracy.
Periodic Professional Servicing: Schedule regular servicing from certified technicians.
Preventative maintenance minimizes unexpected faults and prolongs the machine’s operational life.
Developing Standard Operating Procedures (SOPs)
Well-documented SOPs are key to consistent machine performance.
Detail Troubleshooting Steps: Clearly outline the procedures for identifying and correcting common faults.
Include Preventative Measures: Document routine maintenance tasks and calibration schedules.
Train All Operators: Ensure that every operator understands and follows these procedures.
Review and Update SOPs: Regularly revise procedures based on new insights or changes in technology.
Adhering to SOPs ensures that troubleshooting and maintenance are part of your daily operations.
Enhancing Operator Training and Knowledge
Your technical team must be well-trained to manage troubleshooting effectively.
Operator Training Programs
Invest in comprehensive training to equip your staff with the necessary skills.
Hands-On Workshops: Conduct regular training sessions on both semi Automatic and Automatic capsule filling machines.
Simulation Exercises: Use simulated faults to train operators in troubleshooting protocols.
Documentation and Guides: Provide detailed user manuals and troubleshooting guides.
Ongoing Support: Arrange periodic refresher courses to update staff on the latest procedures.
Well-trained operators are the first line of defense against unexpected machine faults.
Knowledge Sharing and Feedback
Encourage an open environment where operators share their experiences.
Monthly Meetings: Hold regular sessions to discuss recurring issues and corrective measures.
Feedback Forms: Use structured feedback to gather insights on troubleshooting practices.
Continuous Improvement: Incorporate operator feedback into updated SOPs and training modules.
Engaged operators contribute to a robust troubleshooting system and overall machine reliability.
Comparative Analysis: Semi Automatic vs. Automatic Troubleshooting
You should be aware of the differences in troubleshooting techniques between semi Automatic and Automatic capsule filling machines. The table below summarizes the key aspects.
Aspect
Semi Automatic Capsule Filling Machine
Automatic Capsule Filling Machine
Operation Mode
Manual loading with automated filling
Fully automated process from loading to sealing
Common Faults
Mechanical misalignment, manual errors in loading
Sensor errors, software glitches, and calibration drift
Troubleshooting Focus
Visual inspection and manual adjustments
Digital diagnostics, software resets, and remote monitoring
Maintenance Requirements
Regular manual cleaning and mechanical lubrication
Periodic firmware updates and sensor recalibration
Operator Involvement
High; operators directly handle capsule loading and adjustments
Low; minimal manual intervention due to full automation
This comparison helps you identify which troubleshooting methods apply to your machine type, ensuring that you implement the right practices for optimal performance.
Advanced Diagnostics and When to Seek Professional Help
Sometimes simple troubleshooting steps may not resolve deeper issues. You should know when it’s necessary to call in advanced technical support.
Recognizing Advanced Faults
Persistent Error Codes: When standard resets and calibrations do not clear error codes.
Recurring Mechanical Failures: When mechanical issues persist after multiple maintenance efforts.
Software Instability: When updates and resets fail to stabilize the control system.
Abnormal Sensor Outputs: When sensor recalibrations do not restore expected performance.
Steps for Advanced Diagnostics
Detailed System Logs: Use comprehensive logs to analyze fault patterns.
Remote Diagnostics: Leverage remote monitoring tools if available.
Technical Consultation: Contact your manufacturer or a certified technician for in-depth diagnosis.
Document and Report: Maintain detailed records of advanced faults for effective resolution.
Knowing when to escalate helps prevent prolonged downtime and ensures that issues are resolved efficiently.
Case Studies: Real-World Troubleshooting Successes
You benefit from learning how other companies have resolved common issues. Consider these real-world examples.
Case Study 1: Resolving Sensor Malfunction
A leading pharmaceutical manufacturer faced intermittent sensor errors on their Automatic capsule filling machine.
Action: Operators recalibrated sensors, performed deep cleaning, and updated firmware.
Result: Production uptime improved by 40%, and capsule consistency increased.
Lesson: Regular maintenance and prompt sensor recalibration prevent recurring issues.
Case Study 2: Eliminating Mechanical Jamming
A mid-sized production facility experienced mechanical jamming in its semi Automatic capsule filling machine.
Challenge: Frequent jamming of capsule feeders disrupted the production line.
Action: Engineers realigned the feeder mechanism, lubricated moving parts, and replaced worn components.
Result: Downtime reduced by 50%, and production consistency was restored.
Lesson: Preventative maintenance and rapid component replacement are key to smooth operations.
Implementing a Comprehensive Troubleshooting Checklist
You can streamline your troubleshooting process by adhering to a well-defined checklist. This checklist ensures you cover all essential aspects systematically.
Troubleshooting Checklist for Automatic Capsule Filling Machine
Power Supply:
Check voltage and connections.
Test circuit breakers and fuses.
Visual Inspection:
Inspect wiring and display panels.
Look for signs of wear in mechanical components.
Sensor Diagnostics:
Clean and calibrate sensors.
Verify sensor alignment.
Control System:
Reset and update the firmware.
Review error codes with diagnostic software.
Dosing System:
Recalibrate dosing settings.
Clean dispensing nozzles.
Mechanical Systems:
Lubricate moving parts.
Inspect feeder alignment and mechanical integrity.
Operator Checks:
Validate SOP adherence.
Document and report issues immediately.
Following this checklist helps ensure consistent production and minimizes operational downtime.
Preventative Measures to Reduce Future Faults
You must not only troubleshoot but also take steps to prevent future issues. Implement these proactive measures:
Regular Maintenance Schedules
Daily: Quick inspections and cleaning.
Weekly: Detailed visual inspections and minor calibrations.
Monthly: Full recalibration and component checks.
Quarterly: Professional servicing and in-depth technical reviews.
Staff Training Initiatives
Ensure your team is continuously trained on troubleshooting techniques and new system updates.
Workshops: Conduct periodic training sessions.
Documentation: Provide updated troubleshooting manuals.
Feedback Sessions: Regularly collect operator feedback for continuous improvement.
Technology Upgrades
Firmware Updates: Maintain the latest software versions.
Hardware Improvements: Replace outdated components with improved parts.
Digital Tools: Invest in advanced diagnostic tools for real-time monitoring.
Conclusion
In summary, you now have a detailed guide on how to troubleshoot simple faults of an Automatic Capsule Filling Machine. By following the outlined diagnostic steps, regular maintenance practices, and preventative measures, you can enhance machine performance, ensure dosing accuracy, and maintain production efficiency. For further detailed advice or to discuss your specific troubleshooting challenges, leave a comment or contact us directly. Your proactive approach today ensures smoother, more efficient operations tomorrow.


 IPv6 network supported


 Home
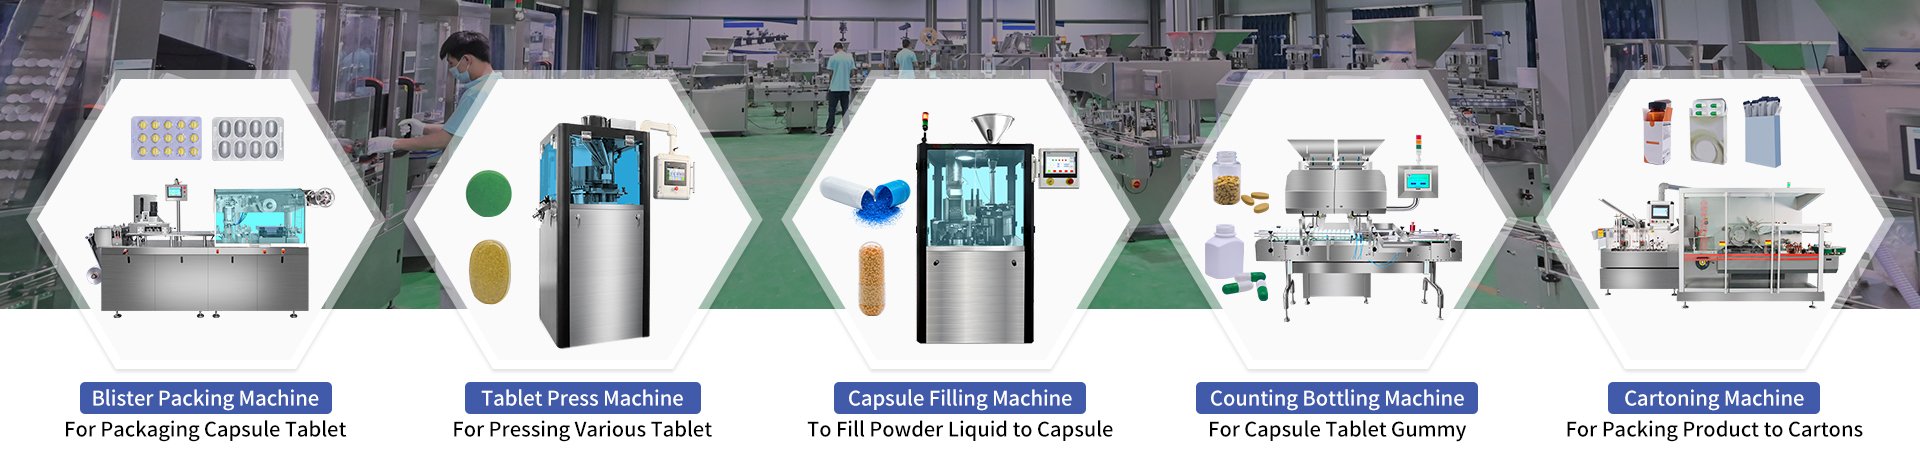
Home Products